How to pay with crypto
(trust wallet)
(trust wallet)
A step by step guide to pay for Ironlink VPN.
TLDR: select how you want to pay at our payment gateway, get the address and then proceed to manually pay using your Trust Wallet. Once paid on your side, wait a few minutes.
TLDR: select how you want to pay at our payment gateway, get the address and then proceed to manually pay using your Trust Wallet. Once paid on your side, wait a few minutes.
Checkout
0
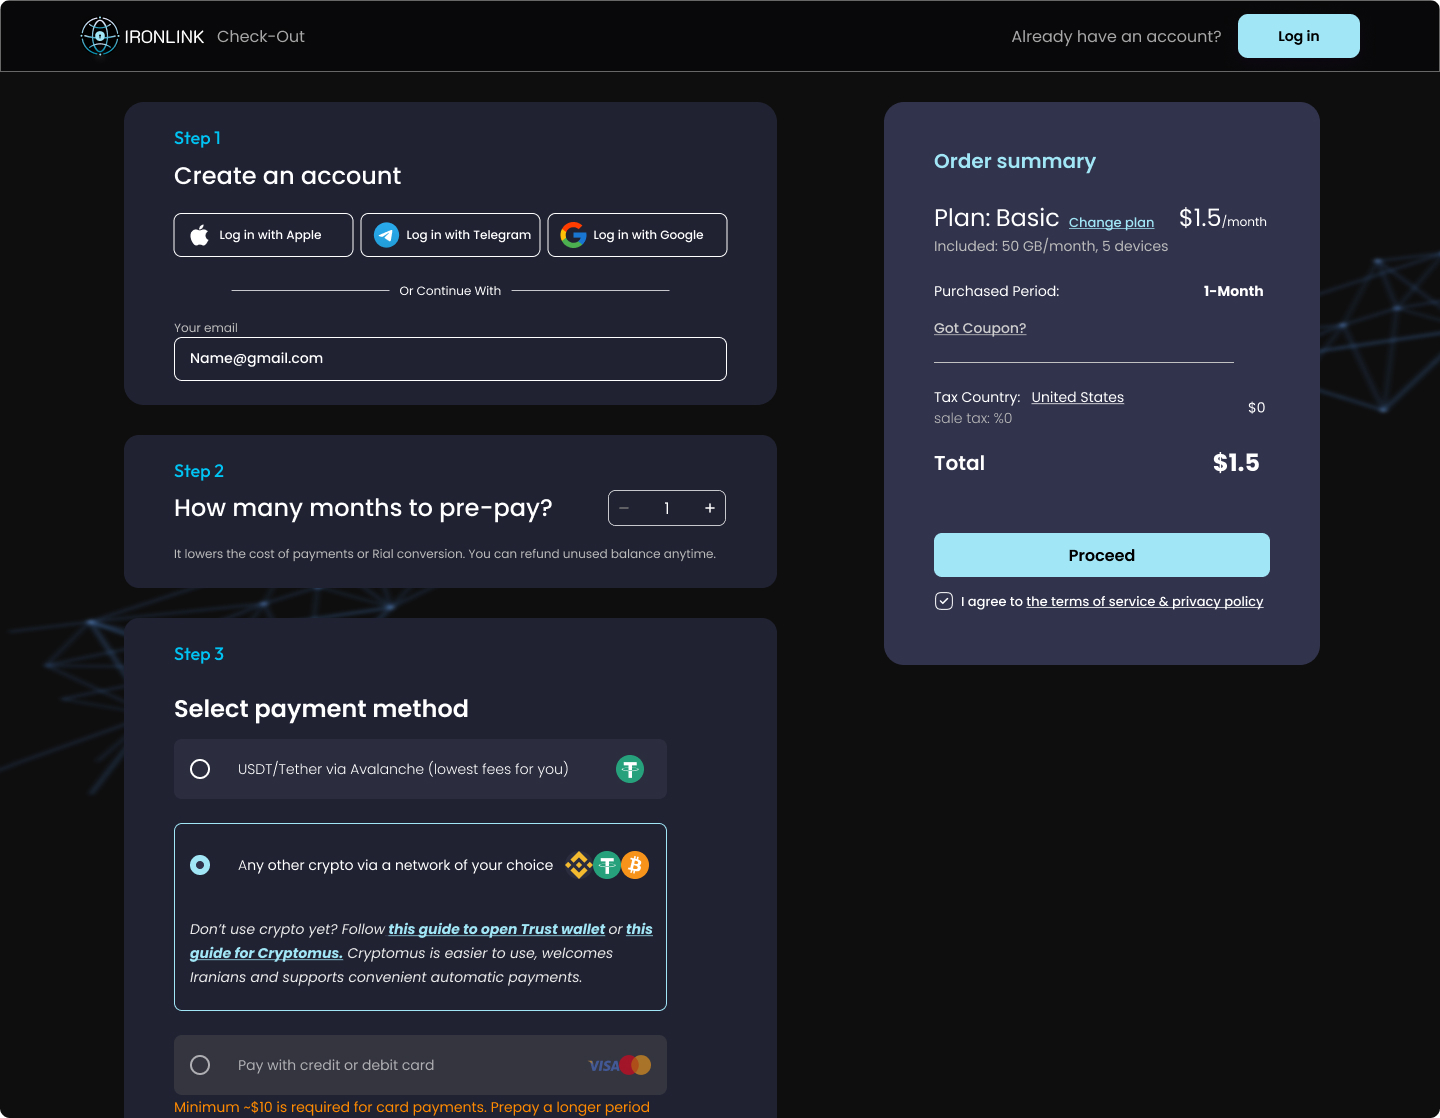
This guide assumes that you have selected a our Basic plan for $1.5/month and are ready to "Proceed to payment"

Select the crypto currency & network
1
- First select any cryptocurrency. It can be USDT, AVAX or other
- Select the network to pay with (Avalanche, Polygon & BSC-20 are typically low-cost, let's assume Avalanche)
- Click to copy the wallet info (remember the network -Avalanche) if you don't want to sign up for Cryptomus

Open Trust Wallet, select the network
2
- In your Trust Wallet, click on the button to Send
- Select the network you have selected in the previous step (in our case, we selected Avalanche = AVAX)
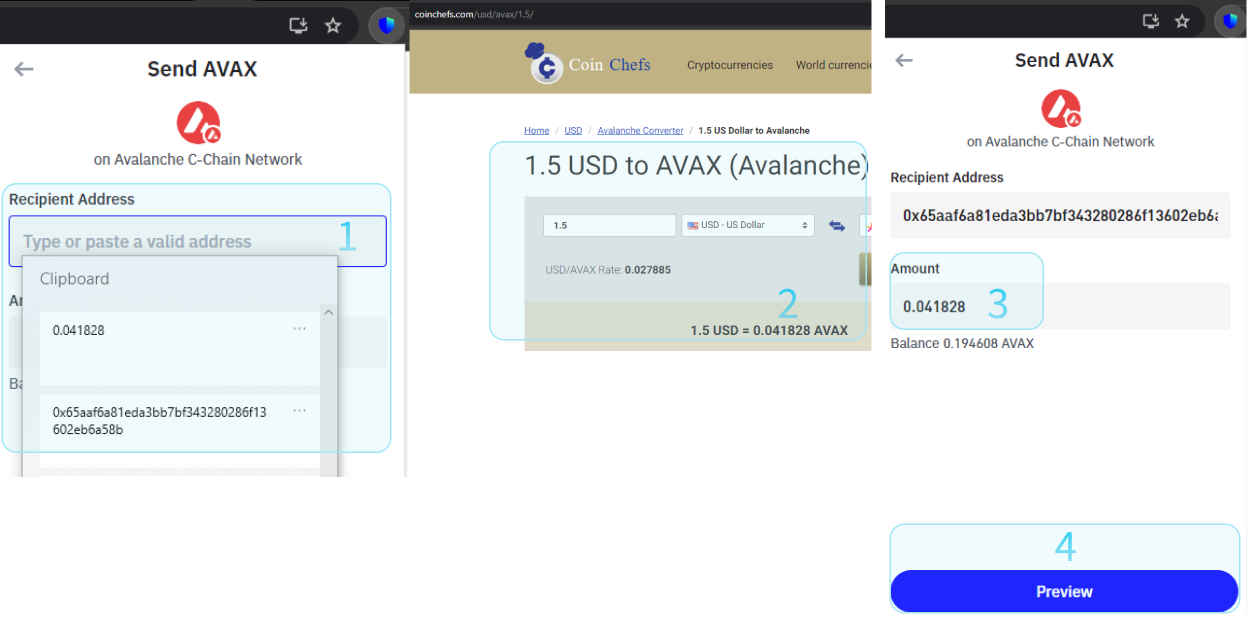
Prepare the payment in Trust Wallet
3
- Paste the wallet address you copied in Step 1.3
- You will likely be sending the money in AVAX token so you need to convert the payment amount to AVAX (US $1.5 to AVAX was 0.41828 at the time of the screenshot)
- Enter the 0.41828 into the amount
- Click on Preview to doublecheck
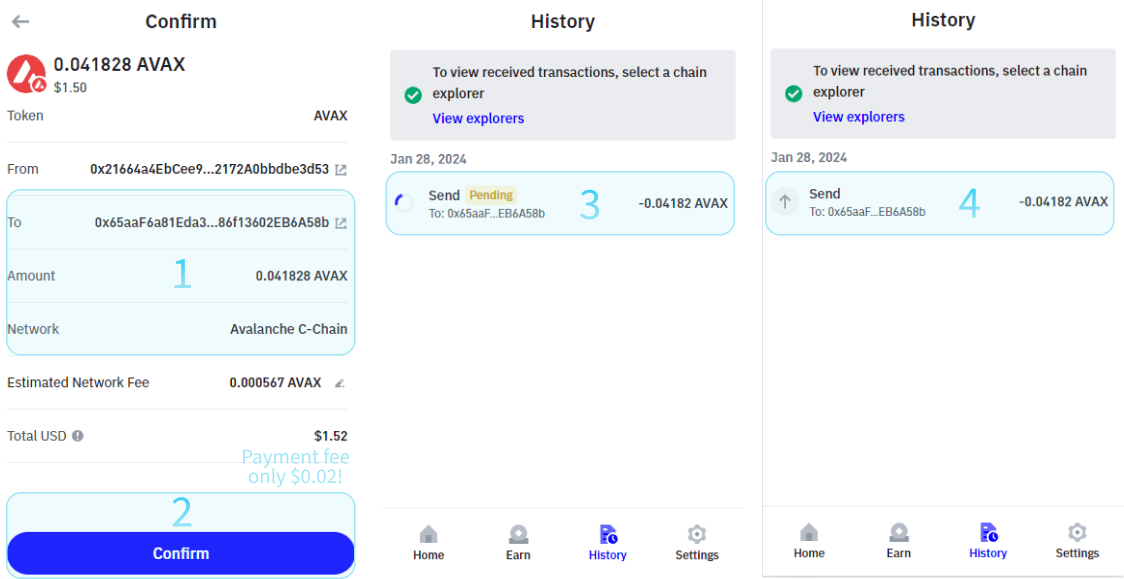
Double-check & send
4
- Best to doublecheck that the "To" address and the network is the same as copied in Step 1.3
- If all good, press confirm
- The transaction will be in "Pending" with a spinning wheel on the left for a few minutes (2-3)
- Once the payment is sent, the spinning wheel will turn into a grey arrow up and the "Pending" will disappear
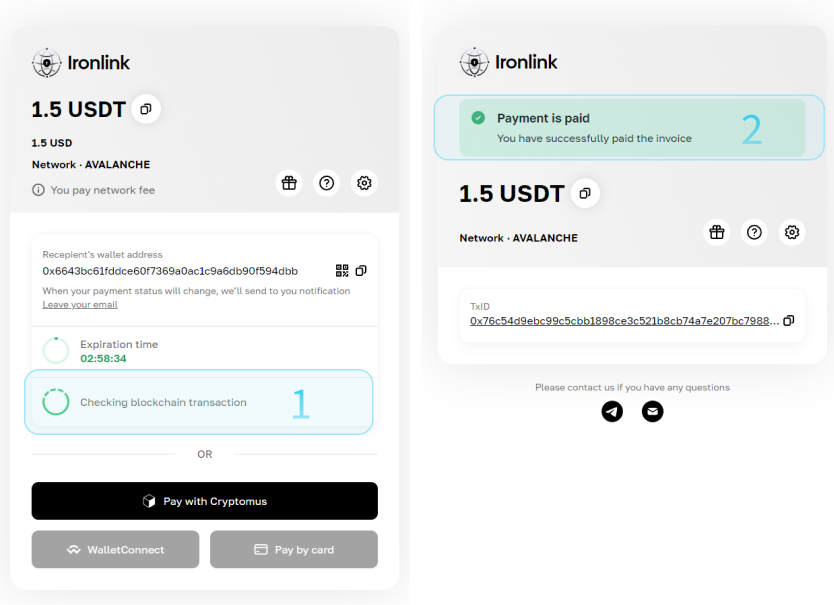
Wait for the confirmation
5
- Come back to the cryptomus payment page and wait for an extra 1-2 minutes. The payment gateway is periodically checking for your transaction to appear
- Once the transaction is registered, the payment will be marked as "Paid". You should be automatically redirected back to Ironlink portal and have the service activated
NOTE: In some cases, it might take UP TO 30 MINUTES for the payment to be received. (Typically for Bitcoin or ETH payments. Best to avoid these as they have high fees.)
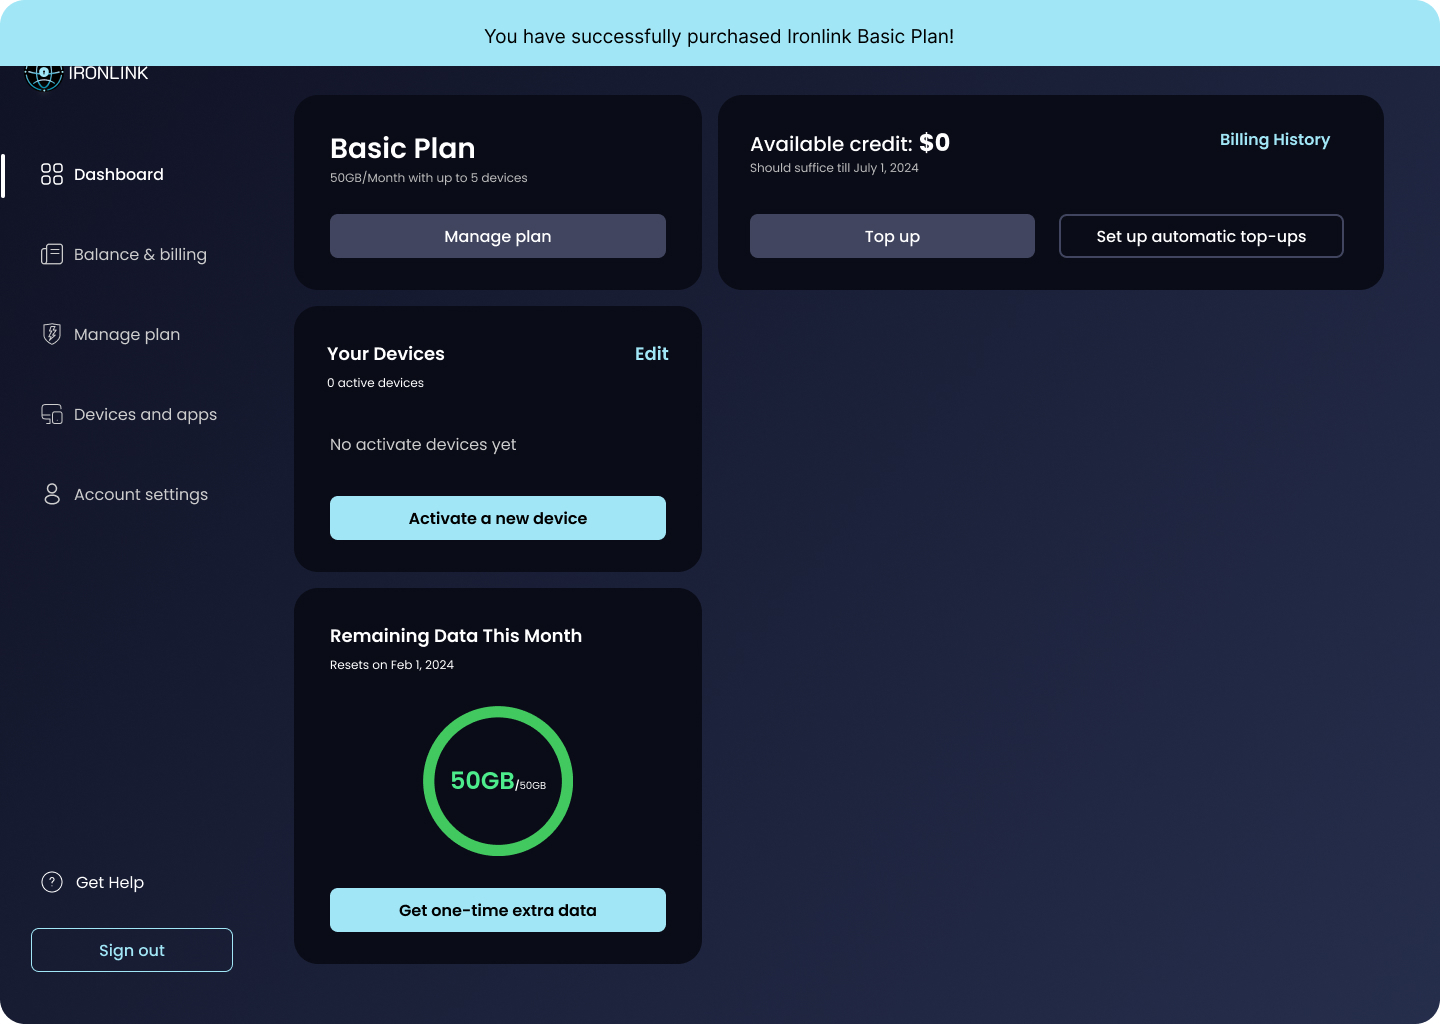
Enjoy Ironlink!
6
Once you open your Ironlink portal, you will see a dashboard with info on your plan, available balance (in case you prepaid more than the initial 1 month).
You will also be able to download the Ironlink app and activate it on any device of your choice.
You will also be able to download the Ironlink app and activate it on any device of your choice.
Have you encountered any issues?
Reach out to us. If you paid but the payment didn't appear or appeared incorrectly, please share info on the network, the your address from which you sent the payment and ideally also precise time so we can look it up and troubleshoot it.
Contact us on Telegram
Constant Us
Get help: [email protected]
Report a bug: [email protected]
Media: [email protected]
Other inquiries: [email protected]
© 2025, Ironlink Networks
IRONLINK
